


Are you feeling crafty this weekend? Try this simple easy DIY to make your own soap. This can be a fun experiment to try with friends or family. Here is a quick recipe and instructions from Apartment Therapy.
Handmade soap is an easy and effective way to add a personalized touch to your bathroom. Whether you've got sensitive skin and want to know exactly what ingredients are going into your soaps, or you want to give your guests that 'boutique hotel' experience while they're staying with you, it's fast, fun and totally worth the investment.

You can purchase soap making kits that come with everything you need, or gather your supplies individually. Craft stores carry a small selection of what you'll need, but you'll have better luck searching online for a soap supply shop.
What You Need
Materials
Tools
Instructions
=
1. Measure out the amount of soap base you'll need according to the soap mold you've chosen to use. Most soap bases come in grid blocks and are easy to cut using a simple chefs knife.
2. Place the cubes in a glass measuring cup and microwave on high in 20 second intervals, checking between each to see if the soap has melted. The higher the number of cubes you have to melt, the more time it will take.
3. Remove the melted soap from the microwave and let it cool slightly before moving on to step 4.
4. Add color and fragrance and stir to incorporate.
5. Pour into a soap mold. You can purchase a mold, or use anything you've got around the house like an old yogurt container or candy mold.
If you see bubbles forming over the top layer, you can remove them by spritzing lightly with rubbing alcohol.
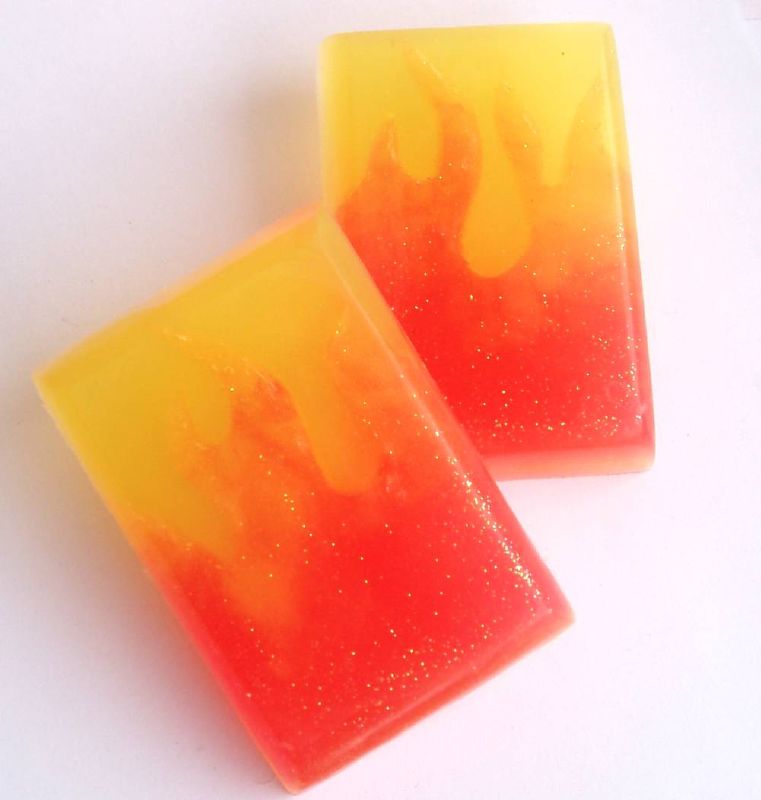
6. If you want your soap to have multiple layers of color, repeat steps 1-4, adding a different color each time.
7. Slowly pour your next colored layer of soap into the mold. To keep the layers from blending together, be sure to wait until the first layer develops a skin before pouring the new layer.
8. Let the soap set up completely before attempting to remove from the mold. I like to let my soap set up for 8-10 hours, or overnight.
9. Remove by pressing in on the edges of the mold. The soap will start to separate from the sides so you can get a hold on a corner.
10. Carefully grab a hold of the loose side of the soap and work it out of the mold.
You can make so many of variations of soaps by using different colors, white, or clear soap base, placing embeds into your molds, adding seeds for exfoliation, or by playing around with various fragrances or oils. Some of the most common types of exfoliants you can add to your soaps are: cranberry seeds, crushed grape seeds, ground pumpkin seeds, strawberry seeds, and walnut shells to name a few.
To add seeds to your soap, simply pour them into the melted base after you've added color and/or fragrance. Mix well to incorporate.
Pour the melted soap base with seeds into the soap mold.
There you have it! A great hand soap with an all natural exfoliant.
Embeds are design elements placed in your soap molds along with the melted soap base. These can be purchased pre made (think tiny ice cream cones, hearts, stars, etc.) or they can be as simple as cutting your soap melt bases into various shapes.
After you've removed your soap from the mold, wrap it in plastic wrap until you plan to use it —especially if it has added fragrance.
The most important thing is to remember to have fun and experiment!
Have a really great DIY project or tutorial that you want to share with others? Let us know! We love checking out what you're making these days, and learning from our readers. When you're ready, click here to submit your project and photos.
0 comments:
Post a Comment