Twitter Delicious Facebook Digg Stumbleupon Favorites More

Friday, May 8, 2015

Vintage Pittsburgh


Celebrate Pittsburgh in style this Saturday at the Vintage Pittsburgh event at the Senator John Heinz History Center.  The event is from 10am-3pm.  This is a perfect event to shop for your last minute Mother's Day gift.  You can learn more at Living Pittsburgh.


WHEN:
May 9, 2015 @ 10:00 am – 3:00 pm
WHERE:
CONTACT:


Celebrate Pittsburgh history in style at the History Center’s annual Vintage Pittsburgh event, presented in partnership with the Pittsburgh Vintage Mixer.

Shop ‘til you drop with 30 local vendors selling genuine vintage fashion, accessories, housewares, vinyl, home décor, artwork, books, toys, small furniture, and collectibles. Then, check out the History Center’s six floors of exhibition space to explore how the past influences the present.


If you are interested in being a vendor at Vintage Pittsburgh, please contact our partners at Pittsburgh Vintage Mixer at pghvintagemixer@gmail.com for more information.

Thursday, April 30, 2015

Make A Bold Decor Move

Photo courtesy Wicker Paradise


We have all seen something on Pinterest that we thought would look so cool, but then said, “I could never do that.” Yes, you can! Aside from things that you may have to ask your landlord for permission for, there are still many things you can do to take risks as you decorate--from furniture, to rugs, to accessories. So here’s that motivation you need to actually put those Pinterest boards to use, courtesy of Apartment Therapy.


1. Decide to do it — This is both the easiest and hardest part. You've thought it through, debated endlessly and now it's time for a simple yes or no. It's liberating! No more, "Gee, I'd really like to have..." or "Someday I'll try a..." That day is today! Don't dawdle, say yes and don't look back.


2. Get inspired — Time for the eye candy. You have a general plan, sure, but browsing some great inspirational images will help you really nail down what you love and what turns your stomach (and with risky decisions, it's usually one or the other). This is also when you'll start to get really excited about your project, which will further cement your decision to do it. Remember: this is fun!


3. Tell everyone — Now that you've made your decision, it's time to share. Telling everyone your plan is an insurance policy that you'll actually follow through. You're accountable, see? Sure, people will have their own opinions (and may decide to share them, unsolicited) but that won't bother you because you're solid in your knowledge that you've made the right decision for you.


4. Baby steps — Don't get overwhelmed and derail your decision. No matter how big or small, breaking down your project into baby steps will help you see a clear, do-able path to the finish line. It may be scary to paint a wall pink, but it's not scary to drive to the paint store — you can do that. It's not scary to grab some paint samples, piece of cake! Now, wash your wall, no problem. Baby steps are everything.


5. Repeat after me: nothing is permanent — There's nothing you can do to your home that you can't undo; it's as simple as that. Don't overthink this. If you don't like it, you'll try something else. Yep, you've spent some time and money to learn what you don't like (a very valuable lesson by the way) and next time you'll do better. The journey to your perfect home is never-ending and that is part of the fun, so don't be afraid to make a mistake once in a while.

Thursday, April 23, 2015

Make Your Own Soup

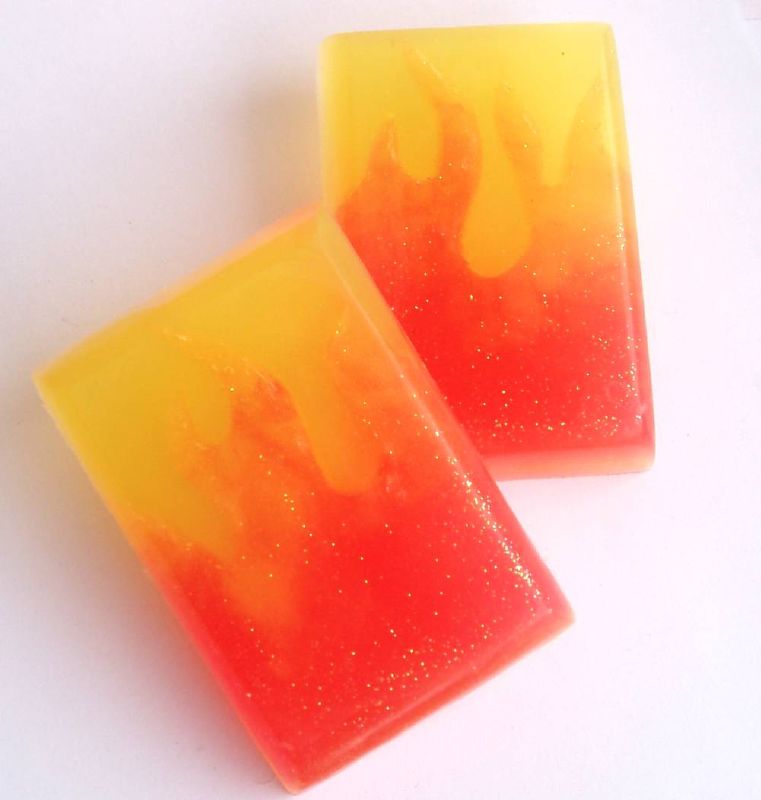
Are you feeling crafty this weekend?  Try this simple easy DIY to make your own soap.  This can be a fun experiment to try with friends or family.  Here is a quick recipe and instructions from Apartment Therapy. 

Handmade soap is an easy and effective way to add a personalized touch to your bathroom. Whether you've got sensitive skin and want to know exactly what ingredients are going into your soaps, or you want to give your guests that 'boutique hotel' experience while they're staying with you, it's fast, fun and totally worth the investment.
Pin it button big
You can purchase soap making kits that come with everything you need, or gather your supplies individually. Craft stores carry a small selection of what you'll need, but you'll have better luck searching online for a soap supply shop.

What You Need

Materials

  • Melt and pour soap base
  • Soap mold
  • Fragrance oils or essential oils (optional)
  • Colorants (optional)
  • Seeds (optional)
Tools
  • Glass bowl or measuring cup
  • Microwave
  • Stir sticks
  • Small digital scale (optional)

    Instructions

      =
      Pin it button big
      1. Measure out the amount of soap base you'll need according to the soap mold you've chosen to use. Most soap bases come in grid blocks and are easy to cut using a simple chefs knife.

      Pin it button big
      2. Place the cubes in a glass measuring cup and microwave on high in 20 second intervals, checking between each to see if the soap has melted. The higher the number of cubes you have to melt, the more time it will take.

      Pin it button big
      3. Remove the melted soap from the microwave and let it cool slightly before moving on to step 4.

      Pin it button big
      4. Add color and fragrance and stir to incorporate.

      Pin it button big
      5. Pour into a soap mold. You can purchase a mold, or use anything you've got around the house like an old yogurt container or candy mold.

      Pin it button big
      If you see bubbles forming over the top layer, you can remove them by spritzing lightly with rubbing alcohol.

      Pin it button big
      6. If you want your soap to have multiple layers of color, repeat steps 1-4, adding a different color each time.

      Pin it button big
      7. Slowly pour your next colored layer of soap into the mold. To keep the layers from blending together, be sure to wait until the first layer develops a skin before pouring the new layer.

      Pin it button big
      8. Let the soap set up completely before attempting to remove from the mold. I like to let my soap set up for 8-10 hours, or overnight.

      Pin it button big
      9. Remove by pressing in on the edges of the mold. The soap will start to separate from the sides so you can get a hold on a corner.

      Pin it button big
      10. Carefully grab a hold of the loose side of the soap and work it out of the mold.

      Pin it button big
      You can make so many of variations of soaps by using different colors, white, or clear soap base, placing embeds into your molds, adding seeds for exfoliation, or by playing around with various fragrances or oils. Some of the most common types of exfoliants you can add to your soaps are: cranberry seeds, crushed grape seeds, ground pumpkin seeds, strawberry seeds, and walnut shells to name a few.

      Pin it button big
      To add seeds to your soap, simply pour them into the melted base after you've added color and/or fragrance. Mix well to incorporate.

      Pin it button big
      Pour the melted soap base with seeds into the soap mold.

      Pin it button big
      There you have it! A great hand soap with an all natural exfoliant.

      Pin it button big
      Embeds are design elements placed in your soap molds along with the melted soap base. These can be purchased pre made (think tiny ice cream cones, hearts, stars, etc.) or they can be as simple as cutting your soap melt bases into various shapes.

      Pin it button big
      After you've removed your soap from the mold, wrap it in plastic wrap until you plan to use it —especially if it has added fragrance.

      Pin it button big
      The most important thing is to remember to have fun and experiment!

      Pin it button big
      Have a really great DIY project or tutorial that you want to share with others? Let us know! We love checking out what you're making these days, and learning from our readers. When you're ready, click here to submit your project and photos.

      Thursday, April 16, 2015

      First and Third Wine Fridays


      The first and third Fridays of every month are casual wine nights at Dreadnought Wines in the Strip District.  This event gives you the chance to try six different wines to decide what you like.  You can even order the wines of your choosing after the event at the same location.  This event is only $12.00 and no RSVP is required.  You can find out more information about great events like this one at Living Pittsburgh. 


      How many times have you stood in a State Store, staring at shelves of wine bottles, wondering ‘will I like it after I buy it?’

      For many years Dreadnought Wines in Pittsburgh’s Strip District has been giving wine lovers the opportunity to experience specialty wines before buying them at the First and Third Friday Casual Wine Classes at our store at 2013 Penn Avenue. Folks gather to experience three red and three white wines, carefully selected by owner Mike Gonze, complimented by breads and paired with fine cheeses from The Pennsylvania Macaroni Company, and to enjoy the company of other Oenophiliacs.

      After experiencing the Wines represented by Dreadnought, patrons can order the wines they like, and pick them up two business days later (as required by state law). Pittsburgh wine lovers can meet and greet each other at these regular Casual Wine Classes twice monthly, from 5:30 to 7:30 PM at the Dreadnought Wines store at 2013 Penn Avenue in the Strip District.

      These events are open to the public at the cost of only $12.00 per person and no RSVP is necessary.

      Thursday, April 9, 2015

      Allegheny Observatory Tours


      Have you ever seen the Allegheny Observatory?  There are night tours this weekend from 8am-10pm. You can tour this working research facility and see the Fitz Clark telescope.  If the weather is clear, you may even be able to see some celestial objects that are within the telescope's range.  You can learn more at Living Pittsburgh. 


      WHEN:
      April 10, 2015 @ 8:00 pm – 10:00 pm
      Repeats 
      WHERE:
      COST: Free
      CONTACT:
      412-321-2400

      Tours of this working research facility begin with a short slide or film presentation and continue with a walking tour that ends at the 13″ Fitz-Clark refractor telescope. If it’s a clear night, you’ll see whatever celestial objects are within the telescope’s range. Tours are free but reservations are required. Call 412-321-2400 between 1:00 and 5:00 Monday through Friday to reserve your spot. Tours are more adult oriented, however children aged 7 and older may attend.

      Thursday, April 2, 2015

      Pens are Lighting It Up Blue.

      The Pittsburgh Penguins are lighting it up blue for World Autism Awareness Day. On April 2nd all of the Pens staff and team will be wearing blue.  The ice will also be lit up blue to raise awareness for Autism.You can learn more here.


      This week, iconic landmarks all over the world – including the Empire State Building, the Opera House in Sydney, the pyramids in Egypt and the Christ the Reedemer statue in Brazil – will all be shining bright blue lights to celebrate World Autism Awareness Day.

      And right here in Pittsburgh, the Penguins will be doing their part to join this global initiative.

      “What’s great is that we’re able to take that and localize it and make it a Pittsburgh thing as well too,” said Brett Spitale, executive director of Greater PA Autism Speaks. “So you’ll see a lot of buildings and different landmarks around the Pittsburgh area that night that’ll be lit up blue in awareness for autism.  This national campaign has gotten support locally and nationally including the Empire State Building and the Eiffel Tower.  You can learn more here. 

      “It’s great that the folks down at the Penguins help us out with this. Pittsburgh is such a great sports town, so what better way to raise awareness than through Pittsburgh sports.”

      On World Autism Awareness Day, Autism Speaks celebrates its international Light It Up Blue Campaign. Thousands of those previously mentioned iconic landmarks, communities, businesses and homes across the globe unite by shining bright blue lights in honor of the millions of individuals and families around the world affected by autism.

      While World Autism Awareness Day actually takes place on April 2, the Penguins will be celebrating it today. The Penguins’ coaches, hockey operations and front office staff are all wearing blue; there will be special graphics on the American Eagle LED pucks; and the ice will be illuminated blue during intermissions.

      While all employees will be wearing blue puzzle piece lapel pins just for the day, Penguins goaltender Thomas Greiss wears an Autism Awareness decal on the back of his helmet every single game.

      It’s a cause that’s important to him, as his girlfriend Brittany Palmer’s niece has been diagnosed as being on the spectrum. They both do a lot to raise awareness, including working with the Steel City Icebergs throughout the season – a local special needs hockey team that plays in the American Special Hockey Association. They've both been special guests at the club's practices, where they skate around with the players offering pointers, tips and just getting to know them.

      “My girlfriend's niece is autistic and it's a different cause because it's family,” Greiss said. ‘They're great kids and they're a lot of fun to work with.”

      World Autism Awareness Day was adopted by the United Nations in 2007 to shine a bright light on autism as a growing global health crisis. Autism is one of only three health issues to be recognized with its own day by the United Nations.

      “Autism spectrum disorder is a neurological disorder that has to do with many different neurological things that aren’t happening in the brain,” Spitale said. “That’s why we’re really here, to be able to raise the awareness and raise the funds to fund the research to try and figure out what’s going on here.

      “This is our day throughout the year that really allows us to be able to bring it to the forefront. Last year when we were doing stuff like this, we were trending the entire day on Twitter and Facebook and all social media outlets nationally. So it’s really a huge, huge day for us and it’s really our day to be able to say you know what, here we are, our folks need some help, our families need some help, let’s shine a light on this.”

      Tuesday, March 24, 2015

      Design Your Perfect Bedroom


      Your bedroom should be the oasis in your apartment, so you want that space to feel as large as possible, whether it is actually large or not. You can use the decor and furniture pieces in your bedroom to manipulate the size of the space. So how do you make a room feel larger than it is? Try these tricks from Apartment Therapy:


      1. Bed drawers and multi-tier nightstands
      It's not within every budget to buy a bed that has built-in storage, but in this small and closet-less space, it appears to have been a vital element to ensure this small space actually functioned the way they needed it. Another fun storage feature? Not just one nightstand, but three, on each side! Floating nightstands have long been a smart choice for small spaces, but here, the addition of even more wall-mounted (or in this case, headboard-mounted) ledges means more room for both needed and decorative objects.


      2. A large, horizontal wall-mounted mirror
      We all know that wall-mounted reflective surfaces like mirrors work magic in small spaces, and in here it's no different. They chose to add the mirror to the wall opposite the door, which is a smart move since it'll reflect an image of the other room, making it feel a little more open than it actually is.


      3. A sliding door
      For privacy, you can't beat a door. For saving space and adding privacy, you can't beat a sliding door, which they made here themselves using mostly items found at Home Depot.
      DIY Home Decor: How To Make a Sliding Door for Under $40


      4. Light-colored black-out drapes that blend
      For those who need a lot of darkness to sleep peacefully, black-out drapes (lined with dark, light-blocking fabric) are a must. But keep the side of the drapes that face the bedroom a light color, preferably a similar color to the wall. This will help them blend in and expand the look of the space visually.


      5. A minimal style
      It just makes sense — small spaces need less stuff, and keeping the decorative elements to a minimum will help keep a small space from feeling cluttered. But, that doesn't mean you have to keep everything out. As this small bedroom proves, you can find a good balance between art, decorative elements and more and still have a room that feels spacious for its size.